How to Change VXDIAG VCX DoIP IP Address during DoNET Remote?
VXDIAG Tutorial: how to change IP address for vxdiag vcx doip diagnostic tools (VCX SE & Multi Tool series).
When you need change IP address as following?
After the VCX-DoIP device is connected to the vehicle, it is equivalent to a vehicle gateway device, and the gateway IP address of the device itself is 192.168.8.1 by default.
During the DoNet remote diagnosis, the device needs to be connected to the user router. In some cases, the router IP address may conflict with the VCX DoIP IP address. In this case, the gateway IP of the VCX device can be modified. This blog describes how to modify the IP address of the VCX-DoIP.
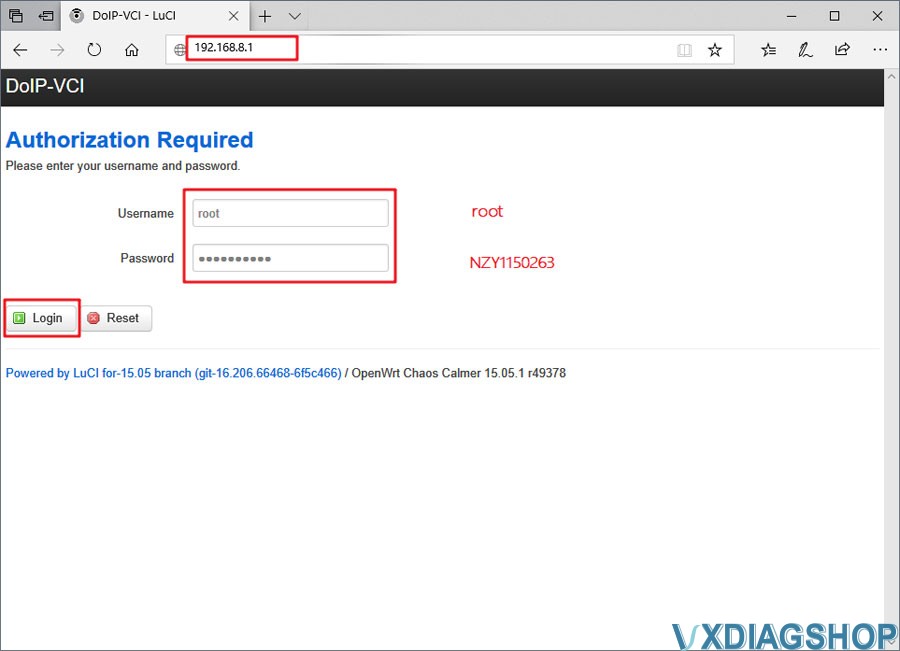
1. Open the browser, go to 192.168.8.1, and login with user name and password
User name: root
Password: NZY1150263

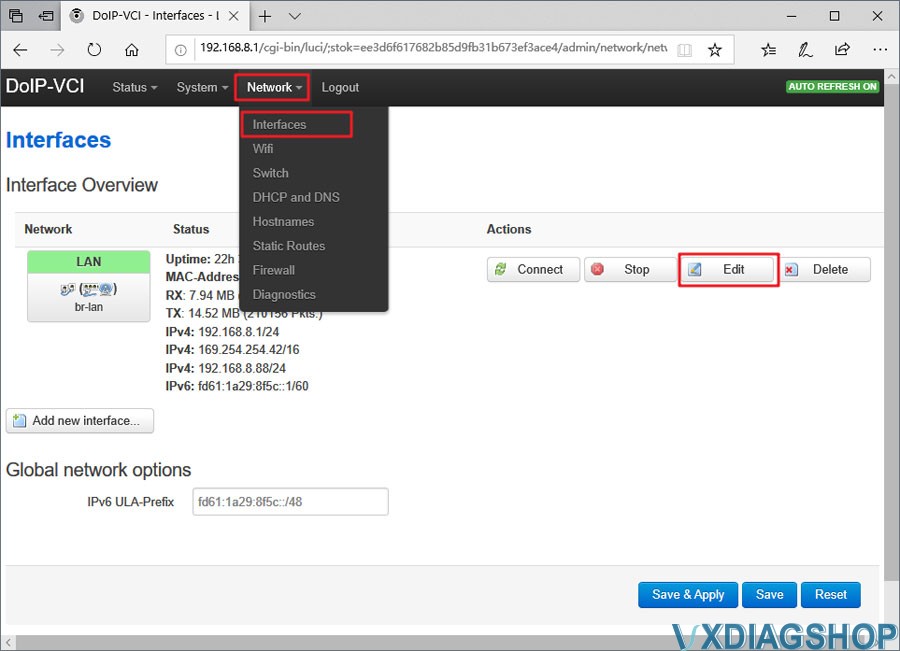
2. Go to Network tab-> Interface
Press LAN Network and [Edit]

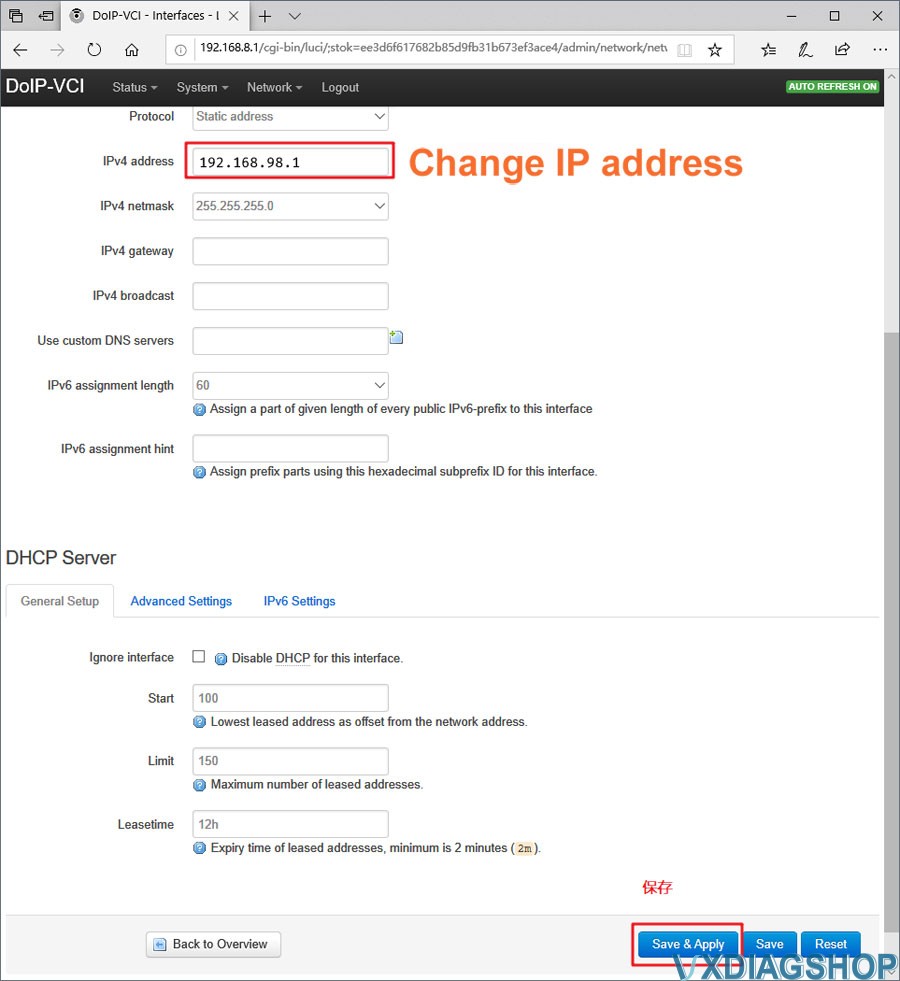
3.
Change IPv4 address to 192.168.8.1 , press [Save & Apply]

4.
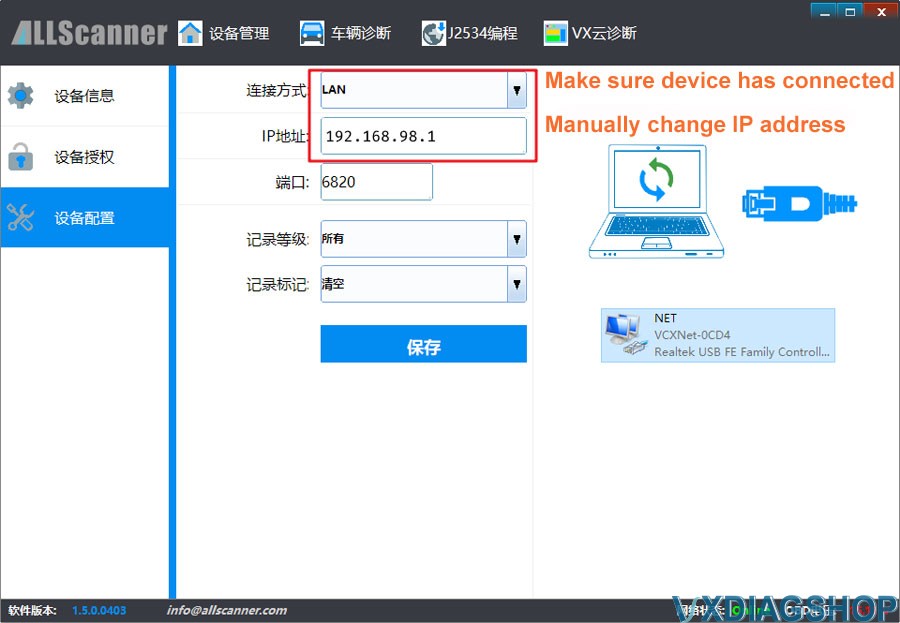
After change the device IP address, you must also change the connection configuration of the VX Manager driver. Open [Device Configuration], select [LAN], make sure VCX-DoIP device has connected and modify the IP address to be consistent with the device IP, click [Save]

The corresponding IP address also needs to be changed when using other connection methods such as WLAN / USBLAN.