How to setup and Network Configuration for VXDIAG VCX "DoNet" Remote Diagnostics
How to setup and Network Configuration for VXDIAG VCX "DoNet" Remote Diagnostics
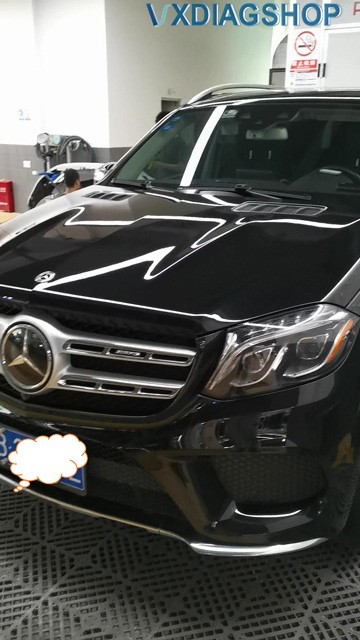
After obtaining VXDIAG " DoNet " remote diagnostics authorization, both Benz DoipVCX SE and VXDIAG VCX box are supposed to configure personal information, bind serial number, and connect to the network successfully. Don’t worry, this article explains in detail how to do it step by step.
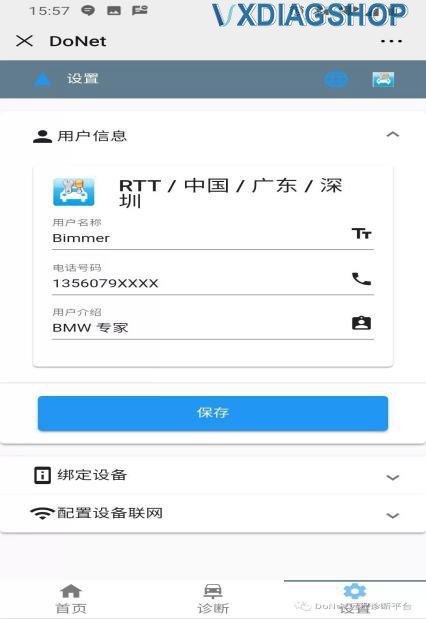
User information needs to be configured for the first use.
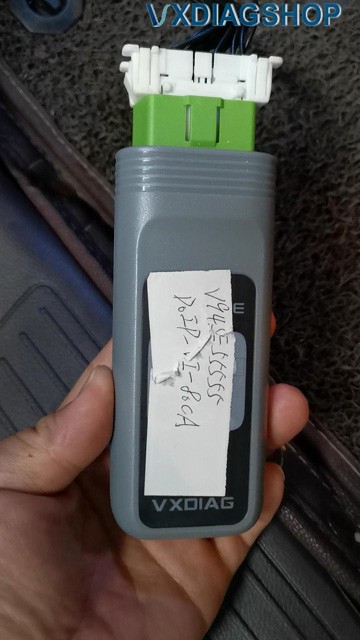
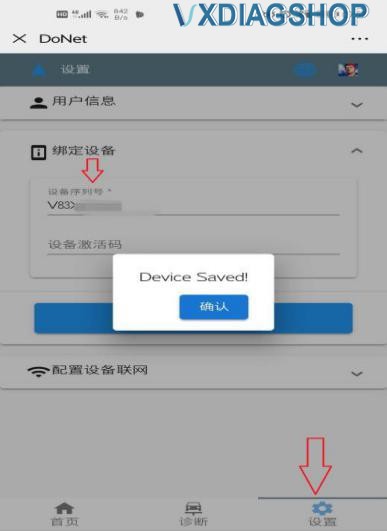
The device serial number needs to be configured for the first use.
Fill in the serial number and click to save.
Go to the homepage to select the method of device networking ( Phone Hotspot is easiest method). Please follow the next instructions to do the network connection and device reset.
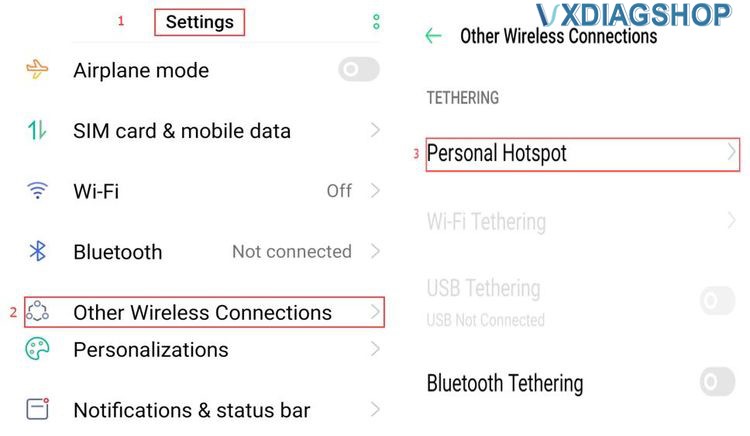
The steps to connect the network using mobile hotspot:
1). Enter the phone "Settings"
2). Select "Other Wireless Connections"
3). Select "Personal Hotspot"
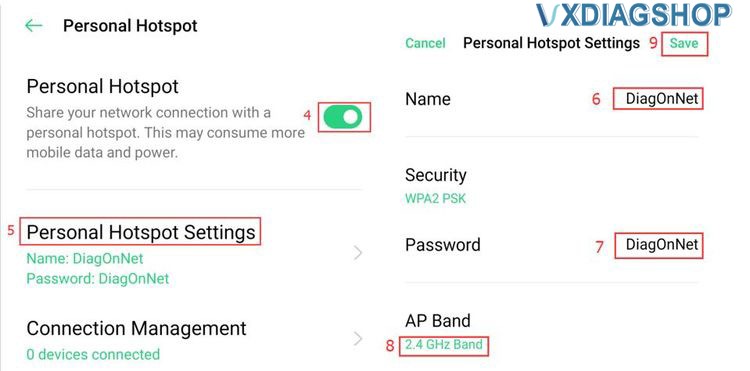
4). Turn on the "Personal Hotspot" switch
5). Select "Personal Hotspot Settings"
6). The name and password must be set to "DiagOnNet", pay attention to uppercase and lowercase!
7). Do not choose 5G network, choose "2.4GHz Band"
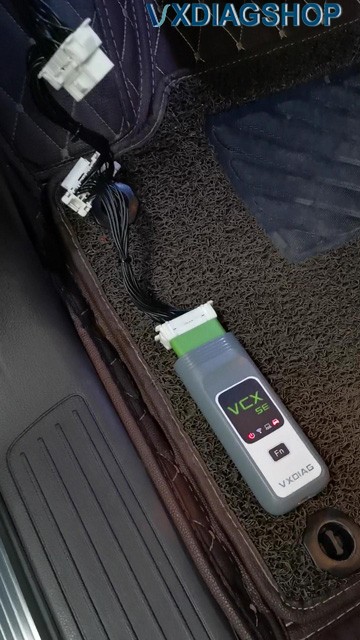
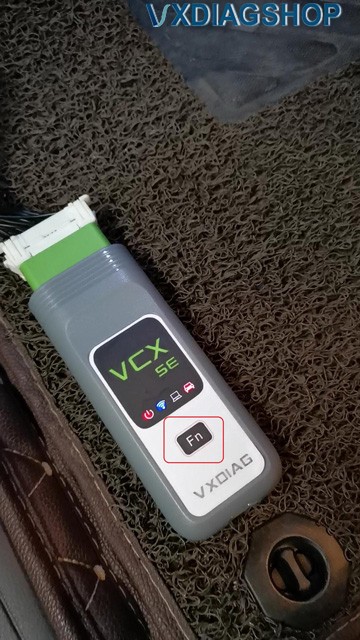
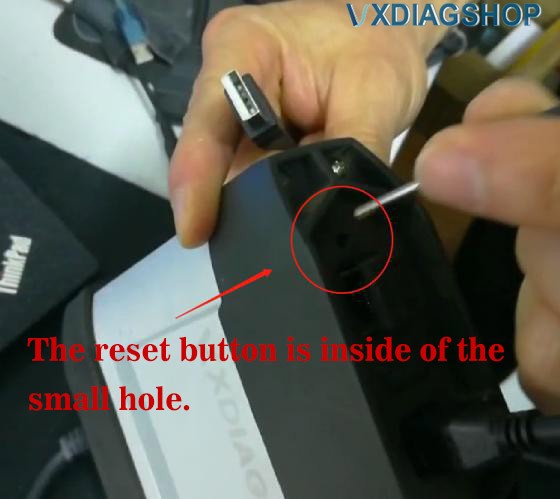
Press the "Fn" button of the VCX SE Benz DoIP device ( for VXDIAG VCX box, The reset button is inside of the small hole) for 2 seconds to enter the network configuration mode,
Wait for about 30 seconds until you hear the beep of the device buzzer, then the network configuration is complete.
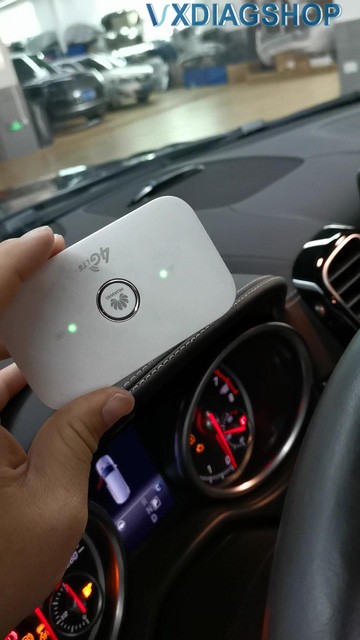
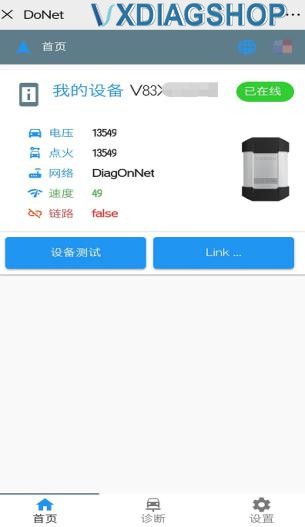
After the device is connected to the Internet, the home page will display device information (as shown in the image).
The device is connected to the network.
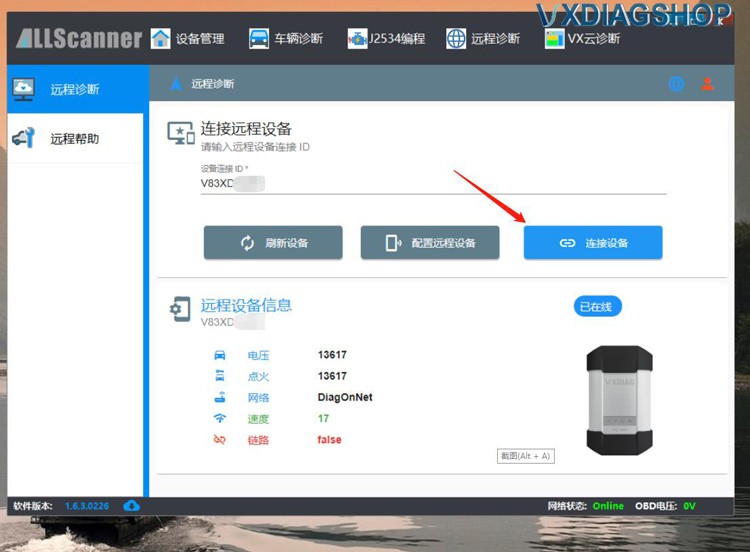
Open the latest version of VX MANAGER device client on the diagnostic computer
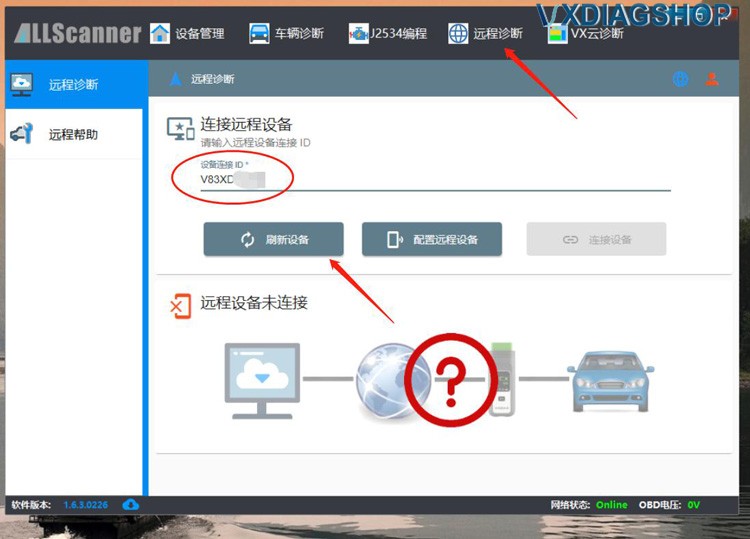
Enter "the remote diagnosis" menu, enter the device serial number, and click on "Refresh Device".
After the device information appears, click on "Connect Device".
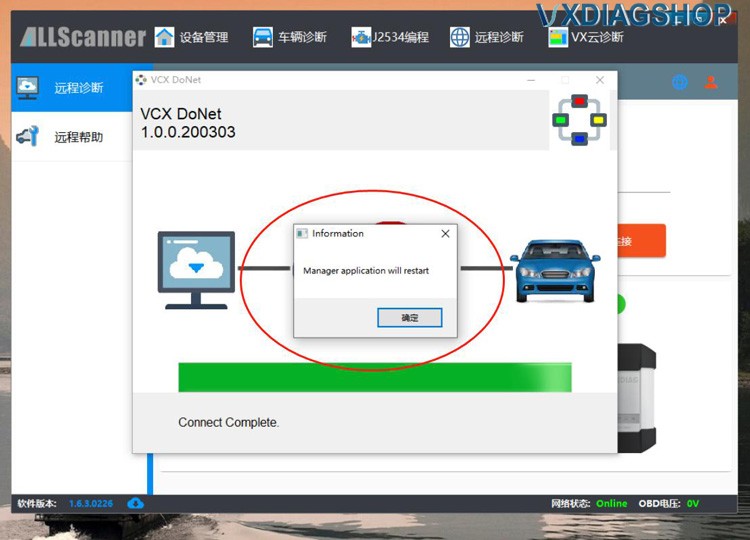
After the connection is successful, you will be prompted to restart the VX MANAGER device client, after that there will be device information in the client.
It means that the device has been connected to this computer and you can start to diagnose and test the car.
 \
\

Alright, the preparations are complete, you just request the VXDIAG technician to assist you in remote diagnosis.
User information needs to be configured for the first use.
The device serial number needs to be configured for the first use.
Fill in the serial number and click to save.
Go to the homepage to select the method of device networking ( Phone Hotspot is easiest method). Please follow the next instructions to do the network connection and device reset.
The steps to connect the network using mobile hotspot:
1). Enter the phone "Settings"
2). Select "Other Wireless Connections"
3). Select "Personal Hotspot"
4). Turn on the "Personal Hotspot" switch
5). Select "Personal Hotspot Settings"
6). The name and password must be set to "DiagOnNet", pay attention to uppercase and lowercase!
7). Do not choose 5G network, choose "2.4GHz Band"
Press the "Fn" button of the VCX SE Benz DoIP device ( for VXDIAG VCX box, The reset button is inside of the small hole) for 2 seconds to enter the network configuration mode,
Wait for about 30 seconds until you hear the beep of the device buzzer, then the network configuration is complete.
After the device is connected to the Internet, the home page will display device information (as shown in the image).
The device is connected to the network.
Open the latest version of VX MANAGER device client on the diagnostic computer
Enter "the remote diagnosis" menu, enter the device serial number, and click on "Refresh Device".
After the device information appears, click on "Connect Device".
After the connection is successful, you will be prompted to restart the VX MANAGER device client, after that there will be device information in the client.
It means that the device has been connected to this computer and you can start to diagnose and test the car.
\Alright, the preparations are complete, you just request the VXDIAG technician to assist you in remote diagnosis.