How to Diagnose Opel Ampera High Voltage Battery and Coolant Heater?
How-to: diagnose and fix the DTCs indicating high voltage loss of isolation: P1AF0, P1AF2, P1E22. In worse cases, this also includes P1AF4, P1AF6 and P1E20.
This also applies to Chevrolet Volt and Vauxhall Ampera.
Safety First
It is important to start with safety. The high voltage circuits and the battery pack are dangerous, and any diagnostics and repairs connected to the high voltage parts must only be carried out by qualified persons. There may also be local regulations etc. that govern such work. Please make sure you know what you’re doing, use the necessary safety equipment (e.g. insulating gloves, eye protection) and be sure you also have all the other required equipment. And keep others away from the battery pack or other dangerous parts. And be careful. Lift the car in a safe way. And so on. You get the drill.
Battery Heater Diagnostics
The normal procedure for finding out what’s causing a loss of isolation involves systematic testing using an insulation resistance tester (a “megger”). It’s not too difficult to rule out other equipment leaving the battery. The process is described in the service manual. However, that’s not necessary if you have a computer with GDS2 software and e.g. a VXDiag VCX Nano that allows GDS2 to communicate with the car via its OBD2 connector. Actually, I’d say this is mandatory equipment and it makes no sense to try to do without if you consider working on the car yourself. Using GDS2, you can check the isolation voltages (displayed by e.g. the drive motor 1 control module). Newer versions of GDS2 also include a very useful “Vehicle Information” screen under Data Display of HPCM2 module that provides all the necessary information for the diagnosis.
Ampera runs a lot of tests during startup. One of them is a check that the battery heater works properly. It seems that the test is run about one minute after the car is turned on provided the coolant is not too hot already. The battery coolant heater is switched on, and a nearby sensor is used to check that the coolant temperature rises fast enough. Then the heater and the multifunction contactor that provides power to it are turned off. If you check the isolation voltages and see them fluctuate at startup or go wild around one minute after the car is started, and then smooth out after a short while, my bet would be that the battery coolant heater is the culprit. I believe this test can be attributed to the fact that many encounter the issue during colder periods, where it may take a bit longer to finish the test which increases the chances of triggering the DTCs from the diagnostics that the inverter runs. That’s just my hunch, however.
Even without any special equipment it’s possible to do some diagnostics by following the check engine light. If, after having the 12V battery disconnected for a while or DTCs reset by other means, the engine light illuminates after maybe the third time you turn the car on, but only after a minute or two, at least the symptoms match what I’ve seen. Obviously the DTCs can also be triggered when the battery heater is actually used, i.e. it’s very cold.
A Bad Battery Heater
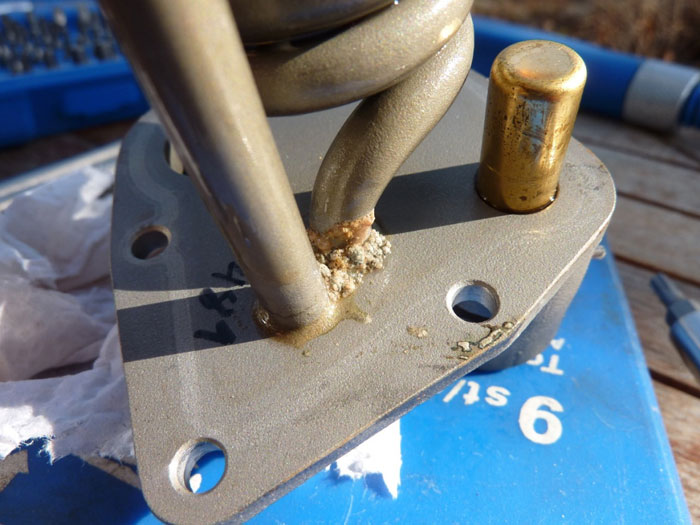
This is the heating element exposed. Doesn’t look too good, but the other one I’ve opened was even worse.
Repair Procedure
What makes the repair complicated is that the battery pack needs to be dropped from below the car.
Tools Required
In addition to normal workshop tools, at least the following equipment is needed for carrying out the repair:
- Tools to lower and raise the battery pack. See below for more information.
- Vacuum coolant refill kit
- GM GDS2 and suitable hardware (PC and an MDI clone or e.g. VXDiag VCX Nano)
- Pipe wrench
- Red thread lock liquid
- Torque wrench
- Ratchet spanners especially if you intend to lower the pack using threaded rods
Summary of Required Steps
A quick summary of required steps (from memory, so inaccuracies are possible):
- Disable high voltage by removing the manual service disconnect (MSD)
- Verify that high voltage is disabled (follow the steps in the service manual)
- Remove the four screws around MSD
- Jack the car up. You need to have at least about 40 cm of clearance from the ground (and more if you need to move the pack from underneath the car), so the car needs to be fairly high off the ground. Use jack stands or other means to make sure the car is secure. Even better if you have access to a proper vehicle lift.
- Remove the heat shield from the front of the battery and another one from left rear.
- Remove the underbody air deflectors covering the battery.
- Disconnect earth straps from underneath the rear heat shield.
- Drain battery coolant by removing the pipe retainers and the coolant pipes from the quick connectors at the front of the battery pack. The connectors may be tight.
- Remove electrical connectors (first the lowest two, then the interconnect on the cover of the main high voltage cable connector housing, then the uppermost ones, then the main connector.
- Lower the battery pack.
- Open the battery pack cover.
- Remove the relay/junction block at the front of the pack.
- Replace the battery coolant heater.
- Reconnect the rely/junction block.
- Refit the battery pack cover.
- Raise the pack.
- Attach connectors and coolant hoses in reverse order.
- Reconnect the earth straps.
- Refit the underbody air deflectors.
- Refit the heat shields.
- Refit the screws around the MSD.
- Refill coolant.
- Enable high voltage.
- Run the coolant bleed process.
- Hope for the best!
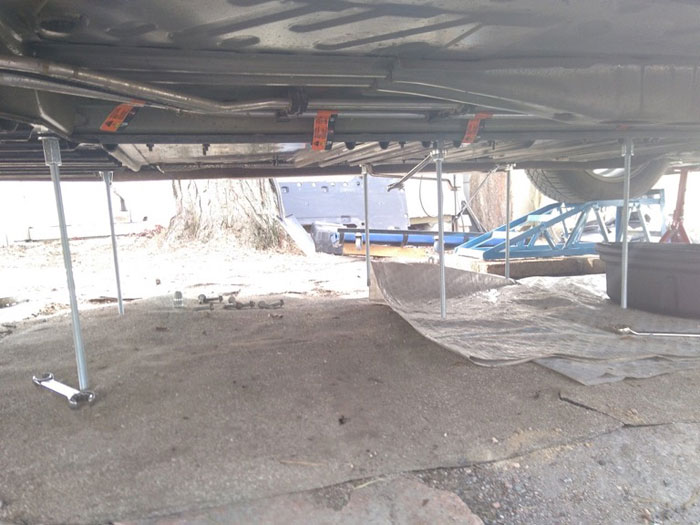
Lowering the Battery Pack
The official procedure includes lifting the car high up, fixing a support fixture to a lift table, raising the lift table to meet the battery and then lowering the battery supported by the fixture. Here it is assumed this equipment is not available.
You could use e.g. a sheet of thick plywood and jacks to support the battery pack while lowering it. It’s also possible to use e.g. threaded rods in corners and lower the pack supported by nuts in the rods. The four rear screws are M8 (8mm) and others M10, all standard pitch. I’d use a plywood sheet and a a couple of inexpensive low profile motorcycle scissor lifts (screw-actuated ones for easy and precise control) and threaded rods as guides and safety. In any case it’s essential to make sure that the pack doesn’t tW-I-St, as it could cause e.g. coolant leaks.
Battery Pack Cover
The cover may be a bit stiff. Take your time and work it slow. There’s also some sealing putty in the front, so you will need to overcome it. Once released, you can just lift it to the battery well and support it e.g. with pieces of wood.
Note that when refitting the cover red thread lock fluid should be used. The order the screws are tightened is also important:
- Start from the left side of the junction block at the front.
- Move towards back on the left side until you’ve done the inverted L.
- Move to the right side and continue until the middle at the back of the pack.
- Continue from left side to until you reach the middle in the back.
Coolant Heater Replacement
The coolant heater element is a part of the relay/junction block at the front of the battery pack. To remove it, you’ll need to at least partially remove the junction block. After disconnecting the plugs and the coolant pipe you’ll need to use a pipe wrench or such to unscrew the quick connect. It’s the only thing holding the battery heater. Make sure to wipe any dripping coolant from inside the battery pack.
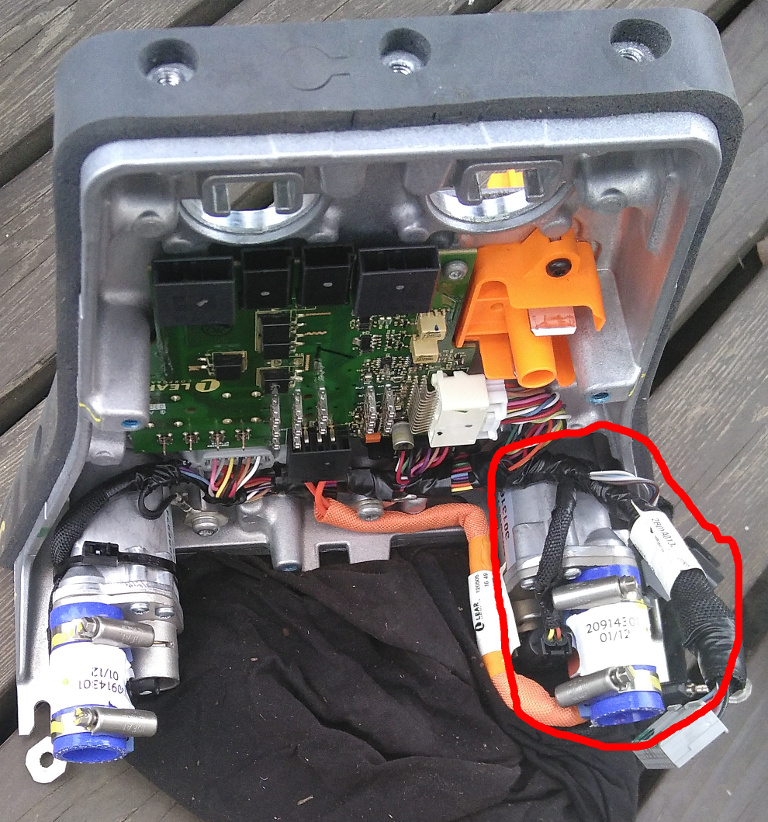
Battery heater is circled in red in the image above. Note that the BECM module (black metal box) and contactor board have been removed.
Raising the Battery Pack
When raising the battery pack back to its place in the car, it’s vital to make sure that the coolant lines and cables don’t get smashed or squished. So take it slow and keep checking the situation. If you don’t use threaded rods, be extra careful to position the pack correctly. In the final phases you can insert the screws to guide the battery in place. If you use threaded rods as guides, make sure the pack doesn’t stick to a rod. OtherW-I-Se there’s danger of tW-I-Sting the pack, which could cause e.g. coolant leaks.
Refilling the Coolant
You will need a vacuum refilling kit and GDS2 to replace the coolant. Use only DexCool Premix. And run the bleed procedure twice.
Some have reported success with replacing the coolant without any special equipment, but I wouldn’t take the chance. The procedure was devised after it was found out that air pockets may otherW-I-Se be left in the cooling plates in the battery pack, and that could cause hot spots that affect the life of the pack.